73% of B2B marketers say that webinars are the best way to generate high-quality leads. It’s easy to see why - webinars are highly engaging and informative.
But some people still believe that webinars are too complicated to run, especially when it comes to setting up an effective webinar workflow.
What is a webinar workflow? Well, a workflow is a series of sequential tasks that, when completed, achieve a certain goal.
For webinars, this refers to the digital journey your attendees go on before, during, and after attending your webinar (or webcast or virtual event). It includes the registration page, email invite, reminder, auditorium page, and webinar follow up.
Putting together a webinar workflow isn’t actually that complicated, but you’ll want to plan it out so you don’t miss anything, while ensuring everything is on-brand and on-message. It will also differ slightly depending on your webinar platform and CRM. For example, if you’re using the WorkCast for HubSpot webinar integration, a lot of your workflow will be automated.
But, the basic premise is the same no matter what tools you’re using - so let’s take a look at how to create a webinar workflow.
Step 1: Create Your Landing Pages
The landing pages are the first step in any webinar workflow. Why? Because the rest of your marketing collateral will be pointing to at least one of these pages, so they need to be complete.
For webinars, you’ll need the following landing pages:
- Registration Page
- Thank You Page/Confirmation Page
- Auditorium
The registration page is really important as it is the gateway to your event.
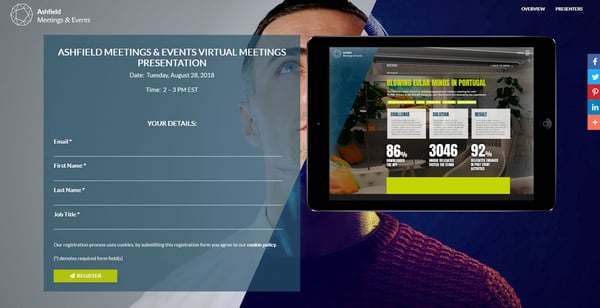
Not only do you want to make sure it’s on brand, but your messaging needs to be compelling enough to make people register. I know, that can be harder than it sounds, but it can help to keep the following in mind:
- Make sure you have a great, optimized title
- A subheading can help: it should be strong and succinctly outline the benefits of the webinar
- Have a strong CTA: Register Now, Sign Up, and Save Your Seat are all clear, strong CTAs but don’t be afraid to get creative
- Section your copy: short, succinct paragraphs are easier to read (5 lines or fewer) and bullet points are also a great way to draw attention to important or interesting information
- Photos help: a good header image, and of course, great images of your speakers give the page a visual pop (and don’t forget to put in relevant alt-text for SEO)
These tips are also relevant to your auditorium. Your job isn’t done once your attendee has registered and confirmed. If your auditorium page isn’t compelling, people won’t actually watch the webinar. To get that all-important conversion rate up, make sure your auditorium page follows the lead of your registration page.
And don’t forget about the confirmation page. This may seem like a small thing, but it’s important to give your potential attendees all the tools they need to attend, like a calendar reminder.
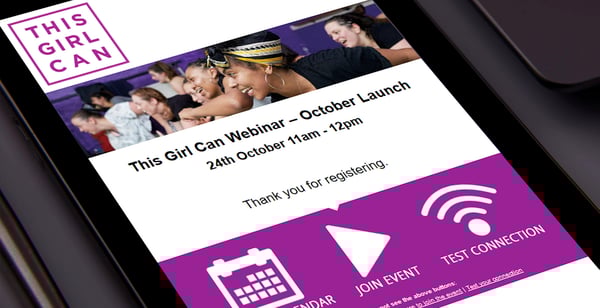
Think of the calendar reminder like step 1.1 in your workflow. This needs to be set up for your confirmation page (and confirmation emails, which we’ll get to next).
Step 2: Confirmation and Reminder Emails
It’s important to set up your confirmation emails at the same time as your landing pages so attendees get an email confirmation to their inbox immediately.
The confirmation emails don’t have to be elaborate - and in fact, a lot of webinar platforms automate this part of the workflow for you - but they should include the date and time of the webinar, an option to add to calendar, and a link that sends them to your auditorium page.
Reminder emails can also be set up at the same time, and should include the same information at least, though you may want to send more comprehensive reminders from your own email client.
How often should you send the reminder emails? That depends but we have found success sending a 1 week reminder, a 1 day reminder, a 1 hour reminder and (yes and) a 15 minute reminder. This may sound like a lot, but you’d be surprised how easy it is for people to forget they signed up for something. Keeping your event top of mind for them is crucial to ensuring they actually attend.
Step 3: Email Invitation
Ok, so I probably don’t have to tell you that your invitation is one of the most crucial aspects of your webinar workflow. Email is the single most effective way to get people to your webinar, so your email invite needs to be great.
How do you do this? Well, like when you’re putting together your landing pages, it helps to look at the different components of your invite:
WHAT: Your webinar title
WHEN: Time of the webinar (date, time and duration)
WHO: Tour speakers, guests, hosts, etc.
HOW: CTAs and instructions on how to register
WHY: What are you offering attendees?
Don't forget about your subject line either. This is the first thing people will see in their inbox. Follow the best practice we’ve mentioned so far - less is more. Your subject line should be short, strong and relevant. It can also help to personalize it (emails with personalized subject lines are 26% more likely to be opened)
Same with your copy. Short, simple but clear, and interesting. You need to tell people why they should give up an hour of their time to listen to you.
And remember, one email invite won’t do much! The biggest mistake we see people make is sending out one invite and expecting attendees to come flocking. Sending more than one email invite is the key to increasing your registrations. Ideally you would start promoting 4 weeks out, then send 1 invite a week (to non-registrants) up until the day of the webinar. We find that more than 35% of our registrants register the week of the webinar.
(Another secret tip: we increased webinar registrations more than 20% by sending an invite out on the day of the webinar).
If you’re afraid of bombarding your contacts, have an added value with each subsequent email i.e. announce your speakers in the second email, point them to a relevant blog post in the third.
Step 3.1 Other Promotion
Don’t forget your other promotional channels. Social media, paid search, blog, even Google My Business. These are all channels at your disposal, and you shouldn’t neglect as part of your webinar strategy. While this promotion may not strictly be part of your workflow, they are connected.
You’ll be sending attendees from these mediums to your landing pages and auditoriums, so make sure you keep everything on-brand and consistent with your messaging.
Step 4: Post-Webinar Follow-Up
Your webinar workflow doesn’t end when your webinar does. There are a few key elements to effectively following-up with your attendees.
The first is the on-demand recording. When WorkCast runs webinars, we send the on-demand recording to both registrants and attendees. Not everyone can make the live event, and even those who did, may want to take their time and go through the content again.
Again, a lot of platforms can automate this part of your workflow, but we have found more success in sending this from our own email client (we use HubSpot). This allows us to really personalize the message, and offer extras such as downloads or a link to our next webinar.
You may also want to bring in elements like surveys of feedback requests so that you can gather more information for/about your webinars.
It’s also best to send the follow-up 24 to 48 hours after the webinar. You want to keep these prospects hot and engaged. This doesn't mean you can’t also follow-up with them again later, but getting communications to them within that time frame will ensure they remain engaged (something your sales team will thank you for).
For everything you need to know about running and planning a webinar, check out our free eBook The Ultimate Webinar Handbook.
Share this

How to Create an Email Workflow in 10 Simple Steps

How to Create a Webinar Using PowerPoint